This DIY Holiday Arrangement Is Worthy Of A Hallmark Movie Set

(Photo: Christie Vuong)
With the holidays fast approaching, you may be feeling the overpowering urge to transform your home into a Hallmark movie set. To get that classic look on a budget, we tapped Sue Dodd, floral manager at The Watering Can Flower Market in Vineland, Ont., for tips on how to make DIY holiday urn.
Think of these urns as flower arrangements, with a Christmas decor twist. A smaller version even makes a lovely host or hostess gift.
For this project, Dodd sourced affordable, grown-in-Canada greenery, branches and decorative touches to make a statement piece that will last throughout December and beyond.
“If you’re in a region that gets cold winters, your arrangement can last up to three months,” she explains. Use whatever greenery and accents you can find at your local florist or grocery store, or even in your backyard. (A foraged arrangement is a great way to save money.) “There is really no right or wrong way to do this,” says Dodd.

Materials
-
- Pedestal urn or other decorative container
- Plastic pail (optional)
- Floral foam (or an eco-friendlier alternative, such as soil, gravel or compact moss)
- Clippers
- Greenery, branches, berries and ornaments of your choice
How To Make A DIY Holiday Arrangement
Step 1: Pick your greens

As a rule, Dodd recommends layering four or five types of greenery to create depth and texture. For this project, we used rosehip branches, Carolina sapphire, cedar, silver fir, pine, magnolia, boxwood, grey seeded eucalyptus and pine cones.
Always trim your greens at the base, according to the size of your container and their placement in the arrangement. (Use floral shears to keep the stems healthy. These garden scissors have over 17K 5-star reviews.)
Freshly cut each stem before using it. “Cutting allows water to go up the branch,” explains Dodd. Cut off any offshoots from the portion that will be inserted into the foam.
Step 2: Prep your urn

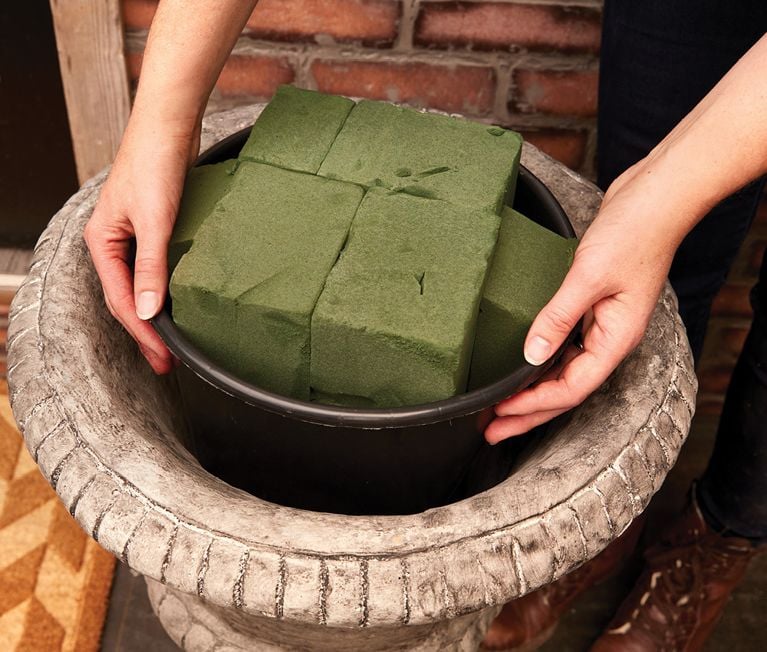
Line the bottom of your urn with floral foam, which you can get from your local florist or the dollar store. “You can cut foam at an angle, so it fits in snuggly,” says Dodd. “If it moves, it’s not tight enough.” For an eco-friendlier alternative, use soil, gravel or compact moss.
Instead of making your arrangement directly in the urn, use a plastic pail that fits inside it, making cleanup easier.
To get the full Hallmark effect, keep things classic with an ornate pedestal urn like this one.
Step 3: Build height

Place larger components, like branches, first and in the centre. Dodd used rosehip branches and a few stems of Carolina sapphire, but dogwood, curly willow and birch are also popular choices.
Once you insert something into the foam, don’t pull it out. Too many holes can cause the foam to break.
Step 4: Create drama

To fill out the base, pick greens that have a nice drape. Dodd used cedar first, topped with a layer of upside-down silver fir. “The underside of the fir has a grey hue, and it provides a nice contrast,” she says.
Dodd recommends cutting cedar to a length of 45 centimetres and silver fir to 35 centimetres.
Step 5: Fill in the gaps

Dodd used pine to fill in the space between the centre arrangement of rosehip branches and Caroline sapphire and the base layer of cedar and silver fir. “It’s inexpensive and adds yet another texture,” she notes.
Cut the pine to a length of 30 centimetres. (Remember to account for the size of your container.)
Step 6: Add finishing touches

Once the greenery is in place, fill in any holes that remain in the arrangement. Dodd opted for magnolia, boxwood and grey seeded eucalyptus, as well as pine cones for a playful nod to the season.
Wrap a piece of floral wire around the base of each pine cone. Then, wrap around branches before placing into the foam. For extra cheer, add red and green ribbons.
How To Care For Your Holiday Arrangement
Water the base every two to three days until the temperature drops below zero; after that, the greenery will absorb moisture through the air.
Originally published in 2022; updated in 2023. While the product in this piece has been independently chosen by our editors, this article contains affiliate links, so we may earn a small commission when you make a purchase through links on our site at no additional cost to you.
GET CHATELAINE IN YOUR INBOX!
Subscribe to our newsletters for our very best stories, recipes, style and shopping tips, horoscopes and special offers.